Okay, confession time — for the longest time, I had no idea how to apply hair mask the right way. I used to just scoop out a handful, slap it on my head like conditioner, wait five minutes, and then wonder why my hair still felt dry and frizzy.
Sound familiar?
Yeah… that was me, wasting expensive tubs of product and still walking around with what I lovingly called “the haystack phase.”
Fast forward a few years (and many bad hair days later), I’ve finally figured out how to apply hair mask properly — the kind of way that makes your hair feel like it’s had a mini spa day. It took some trial and error, but once I learned how to do it right, my hair started feeling softer, shinier, and way more manageable.
So, if you’ve got a jar of hair mask sitting in your bathroom, untouched because you’re not sure how to use it — don’t worry. I’ve got you. Let’s talk about how to apply a hair mask the right way, step by step, without making a mess or turning your bathroom into a slippery disaster zone.
Step 1: Start With Clean Hair — The First Rule in How to Apply Hair Mask
Here’s a mistake I made for years — applying a mask to unwashed hair. I thought, “Hey, the mask will fix everything anyway, right?”
Wrong.
If your hair’s covered in oil, dirt, or leftover products, the mask can’t actually sink in. It’s like trying to moisturize your face while you’re still wearing makeup — doesn’t work.
So always start with clean hair. Give it a nice wash using a mild shampoo. You don’t have to strip your hair squeaky clean — just enough to remove buildup.
Once you rinse, squeeze out the excess water and gently towel-dry until your hair’s just damp, not dripping wet. This is important because if your hair is too wet, the mask will literally slide off instead of absorbing in.
Pro tip: use lukewarm water. Hot water feels amazing, but it opens your cuticles too much and can dry your strands out later.
Step 2: Choose a Mask That Actually Suits Your Hair
I used to think all hair masks were the same — a thick cream that’s supposed to make your hair “nice.” Nope. Different masks do very different things.
So before you grab whatever’s on sale, figure out what your hair really needs.
- If your hair is dry or frizzy, go for a hydrating mask with ingredients like argan oil, shea butter, or coconut oil.
- If your hair feels weak, brittle, or damaged, try a protein-based mask (look for keratin, collagen, or amino acids).
- If you have oily roots or thin hair, use a light, balancing formula — clay or tea tree works wonders.
- For curly hair, grab something moisturizing and curl-friendly like avocado oil or honey masks.
And yes, DIY masks can be great too — I love mixing mashed banana, honey, and olive oil when I’m broke or lazy (or both).
Step 3: Section Your Hair — A Key Step in How to Apply Hair Mask Evenly
This one sounds like “ugh, too much work,” but trust me — it’s a game changer.
Instead of randomly smearing product everywhere, section your hair into 3–6 parts depending on how thick it is. Use clips or even old hair ties.
Start applying the mask from the bottom layers of your hair and work upward. That way, you don’t miss any hidden strands underneath.
Think of it like applying frosting to a cake — you want every inch covered, but evenly.
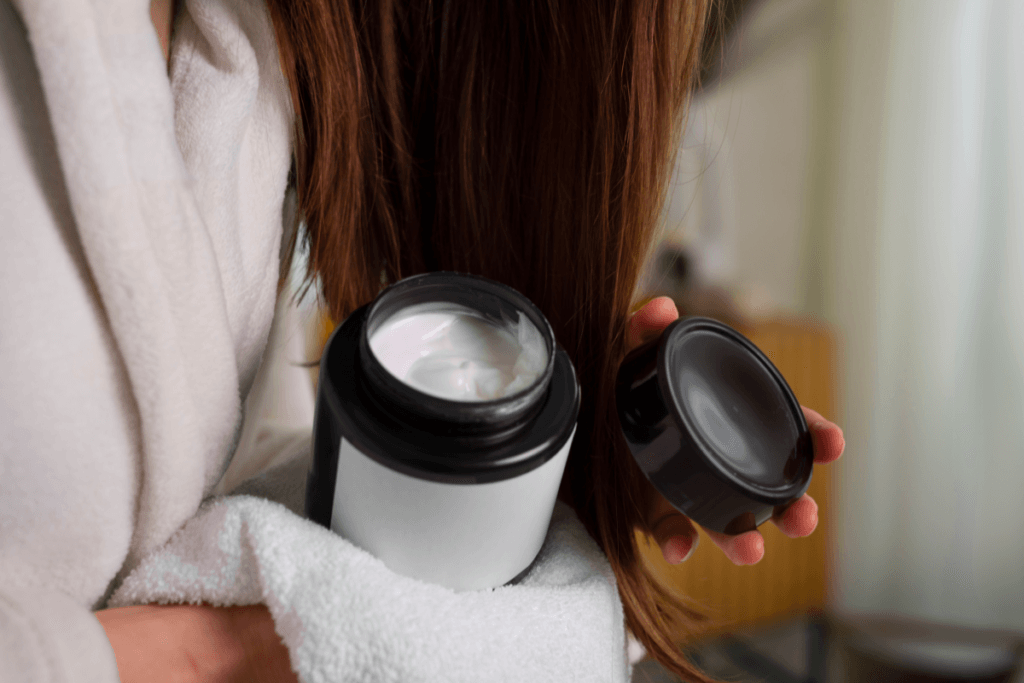
Step 4: Apply It Like You Mean It (But Gently)
Now for the fun part. Scoop some mask into your palms — not too much — and rub your hands together to warm it up a bit.
Then, start from mid-lengths to ends. Those parts usually take the most damage from heat and styling. Run the mask through your hair using your fingers or a wide-tooth comb to make sure every strand is coated.
Avoid the roots unless the label specifically says it’s scalp-safe. Otherwise, you’ll just end up with greasy hair faster than you can say “dry shampoo.”
If you’re using a scalp-care mask, massage it in gently with your fingertips. It feels amazing and helps boost blood circulation too.
When you’re done, your hair should feel coated but not dripping — you don’t want to drown it, just feed it.
Step 5: Wrap It Up and Wait
Alright, now that your hair is fully coated, twist it up into a bun or braid. Then, grab a shower cap or wrap a warm towel around your head.
This step is so underrated. The warmth helps open up your hair cuticles, letting all those nourishing ingredients sink in deeper.
If you want to get fancy, you can dip your towel in hot water, wring it out, and wrap it like a mini spa treatment.
Now, the waiting game.
Most masks work best if you leave them on for about 15–30 minutes. Some people say they sleep in it overnight, but unless the mask says that’s safe, I wouldn’t recommend it — it can over-moisturize your hair and make it limp.
Use this time to do something relaxing — scroll Pinterest, do your nails, or just chill. Self-care, right?
Step 6: Rinse Properly (This Part’s Crucial)
When it’s time to rinse, go for lukewarm or cool water — not hot. You want to seal your cuticles, not fry them open again.
Rinse thoroughly until the mask is completely gone. You should feel your hair getting soft and smooth as you go. If you leave even a little bit behind, it can make your hair feel heavy or greasy.
I like to finish with a quick splash of cool water. It adds that final shine, like a little “thank you” to your hair.
Step 7: Dry Gently — No Rubbing, Please
This might be the hardest part if you’re impatient like me. But listen — don’t grab your towel and start rubbing your hair like you’re polishing silverware. That’s a fast track to frizz city.
Instead, gently pat and squeeze your hair using a microfiber towel or even an old cotton T-shirt (works perfectly!).
If you can, let your hair air dry. It’s the healthiest way to lock in all that moisture from your mask. But if you need to blow dry, use a low heat setting and a heat protectant spray — your hair will thank you later.
Step 8: Know How Often to Use It
Using a hair mask too often is just as bad as never using it.
If your hair is super dry or damaged, twice a week is fine. For normal hair, once a week is perfect. And if you’ve got oily hair, once every two weeks is enough.
More isn’t better here — too much can make your hair limp, flat, or even oily. You want hydrated, not heavy.
Step 9: See the Magic (and Keep It Up)
Once you’re done, take a moment to really feel your hair. Run your fingers through it. Notice how it feels softer, smoother, maybe even a little lighter? That’s the magic of doing it right.
And the best part? If you keep doing it consistently, it only gets better. Your hair starts to behave more, frizz chills out, and even your ponytails look sleeker.
There’s something oddly satisfying about knowing you gave your hair the TLC it needed.
Bonus: What I Wish I Knew Earlier
Okay, here are a few little lessons I wish someone told me before I ruined a few masks (and towels):
- Don’t mix different types of masks at once. One week protein, next week hydration — that’s enough.
- Always read the back label. Some masks aren’t meant for colored hair or certain scalp types.
- A wide-tooth comb is your best friend during application.
- Leaving the mask on longer doesn’t always mean better results.
- Don’t expect instant miracles. The real results show after 3–4 consistent uses.
And most importantly — enjoy the process. Hair care shouldn’t feel like a chore; it’s a small act of love for yourself.
Final Thoughts
I used to think hair masks were a waste of time. Now? They’re one of my favorite parts of my week.
There’s something so soothing about applying a mask, wrapping your hair up, and just pausing. No stress, no rush — just you and your self-care moment.
So if your hair’s been feeling dull, frizzy, or lifeless lately, don’t reach for the scissors. Reach for that hair mask. Use it properly, be patient, and let your hair slowly thank you with that soft, healthy glow.
Trust me — it’s worth it